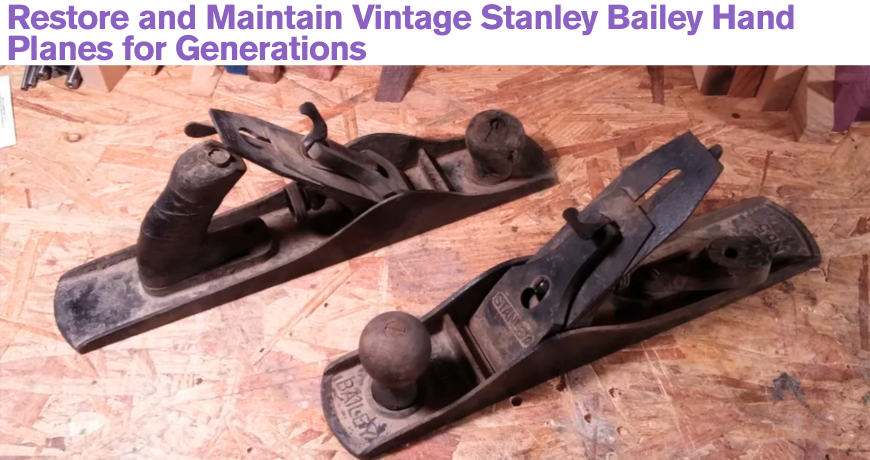
Last month, I bought a rusty Stanley Bailey No. 4 smoothing plane for twelve dollars at an estate sale. The seller called it “probably junk.” Three weeks later, that plane now cuts paper-thin shavings and produces mirror-smooth surfaces.
There’s something magical about holding a vintage Stanley Bailey hand plane – it’s a connection to generations of carpenters and craftsmen who shaped wood with precision and care. These tools aren’t just old equipment; they’re testaments to an era when quality mattered more than profit margins.
Why Restore Vintage Hand Planes?
Quality That Endures: Vintage Stanley planes from the 1940s-1960s represent the golden age of American tool manufacturing. Their solid cast iron bodies and quality steel blades often outperform modern alternatives.
Smart Investment: A properly restored plane can cost less than a new premium tool while delivering superior performance. Plus, you’re preserving a piece of woodworking history.
The Satisfaction Factor: There’s immense satisfaction in bringing a neglected tool back to life, knowing it will serve faithfully for decades to come.
Essential Tools for Restoration
Step 1: Gather Your Restoration Arsenal
Disassembly Tools:
- Quality flathead screwdrivers (1/8″, 3/16″, 1/4″ widths)
- Klein Tools 85071 set won’t strip vintage screw heads
- Channellock needle-nose pliers for gripping small parts
- 12-ounce ball-peen hammer for stubborn components
Rust Removal Kit:
- Loctite Naval Jelly (works better than cheaper alternatives)
- Steel wool grades: 0, 00, 000, and 0000
- Genuine Liberon brand (avoid blue hardware store pads)
- Evapo-Rust for deep rust treatment
Cleaning Supplies:
- Mineral spirits for degreasing
- Clean cotton rags (avoid shop rags with oil residue)
- Mothers Mag & Aluminum Polish for final polishing
- Johnson’s Paste Wax for protection
Sharpening Equipment:
- Three waterstones: 1000-grit, 4000-grit, 8000-grit
- King brand stones offer excellent value
- Eclipse-style honing guide for consistent angles
Complete Restoration Process
Step 2: Document and Disassemble Your Plane
Photo Documentation: Take detailed photos from every angle before removing anything. Trust me – reassembly becomes much easier when you can reference these later.
Remove the Blade Assembly: Lift the cam lever to release pressure on the blade. Grasp the blade and cap iron together and lift straight out.
The cap iron screw has reverse threads – turn clockwise to loosen (this confuses everyone initially).
Extract the Frog: Back out the depth adjustment wheel completely by turning counterclockwise. Remove the two frog mounting screws and lift the frog assembly straight up.
If it’s stuck, tap gently with your hammer using a wood block to prevent damage.
Final Disassembly: The front knob unscrews counterclockwise. The rear handle has two fasteners – remove the top screw first, then work out the through-bolt from underneath.
Step 3: Battle the Rust Effectively
Assess the Damage: Light surface rust rubs off with your finger. Heavy rust creates pitting and rough textures. Don’t be deterred by surface rust – it’s usually manageable.
Naval Jelly Treatment: Work outdoors due to potent fumes. Apply gel evenly and wait 20 minutes for vintage tool rust (longer than manufacturer recommendations).
Watch it turn dark purple as it dissolves rust. Scrub with steel wool in straight lines, never circular motions on machined surfaces.
Evapo-Rust Bath: For deeper rust, submerge parts in Evapo-Rust overnight. It’s surprisingly effective and won’t damage the metal like harsh abrasives.
Progressive Polishing: Start with 00 steel wool to remove residue. Progress through 000 to 0000 for final polish. Each grade should eliminate scratches from the previous one.
Step 4: Flatten the Sole for Precision
Critical Foundation: A perfectly flat sole is essential for accurate cuts. This step separates good planes from great ones.
Setup Your Workspace: Use 220-grit sandpaper on plate glass or granite slab. Work the sole in figure-8 patterns, checking progress with a straightedge.
Continue until scratching is even across the entire surface. Finish with 400-grit for smoothness.
Pro Tip: Use a marker to color the sole, then sand. You’ll clearly see high spots that need more work.
Step 5: Sharpen the Blade to Perfection
Stone Preparation: Soak waterstones for ten minutes before use. Set your honing guide for a 25-degree primary bevel.
Create the Primary Bevel: Start with 1000-grit stone using smooth, even strokes. Continue until the scratch pattern covers the entire bevel width.
Progress through 4000-grit to 8000-grit, each stone eliminating scratches from the previous grit.
The Micro-Bevel Secret: Increase honing guide angle by 5 degrees to create a 30-degree micro-bevel. Take just five strokes on 8000-grit stone.
This tiny secondary bevel does most of the cutting while being much faster to maintain.
Cap Iron Preparation: File any nicks with a mill file, then polish the leading edge on stones just like the main blade. A properly prepared cap iron prevents tear-out dramatically.
Step 6: Restore the Frog and Lever Cap
Thorough Cleaning: Remove all rust and debris from mating surfaces. Sometimes a light polish improves both function and appearance.
Fixing Loose Lever Caps: If your lever cap doesn’t clamp tightly, check for debris under the cam first. A very gentle bend can restore clamping pressure – be cautious here.
Step 7: Refinish Wooden Handles
Cleaning Process: Start with mild soap and water. Use fine steel wool for stubborn grime, working with the wood grain.
Repair Small Dings: Wood filler works well for minor damage. Sand carefully after it cures completely.
Apply Finish: Linseed oil or shellac gives a natural, warm feel. Apply thin coats and sand lightly between applications.
Secure Loose Handles: For wobbly knobs or handles, check screws first. Stripped holes can be fixed with epoxy wood filler, then redrilled.
Step 8: Reassemble Your Masterpiece
Reference Your Photos: This is where those initial photos become invaluable. Take your time and don’t force anything.
Frog Installation: Position the frog for a 1/32-inch blade opening (about dime thickness). Install screws finger-tight initially.
Thread the depth adjustment wheel clockwise until it engages smoothly with the mechanism.
Blade Installation: Position the cap iron 1/64 inch back from the blade edge for general work. Remember those reverse threads when tightening.
Install the complete blade assembly bevel-down, ensuring it rests firmly against the frog.
Final Assembly: Reinstall handles and knob snugly but don’t over-tighten cast iron. Test the cam lever action – it should clamp firmly with moderate pressure.
Fine-Tuning for Peak Performance
Step 9: Align and Adjust Your Plane
Blade Alignment: Use the lateral adjustment lever to center the blade in the opening. Sight down the sole from the rear – the blade should appear as an even line.
Depth Setting: Start with the blade barely touching the sole, then back off slightly. Take test cuts on scrap wood, advancing gradually.
Performance Testing: A properly tuned plane produces continuous, translucent shavings that hold together. Broken shavings indicate issues with sharpness or cap iron position.
Long-Term Maintenance Strategy
Daily Care:
After every use, retract the blade completely and wipe all surfaces with a lightly oiled rag. Store on its side to protect the blade edge.
Monthly Maintenance:
Test blade sharpness on pine end grain – sharp blades cut cleanly without crushing fibers. Touch up on 8000-grit stone if needed.
Apply paste wax to sole and sides monthly, buffing to a shine.
Annual Overhaul:
Complete the sharpening process through all grits once yearly. Check sole flatness and oil moving parts with 3-in-1 oil.
Troubleshooting Common Issues
Blade Chatter: Vibrating blade creates ribbed surfaces. Check cap iron tightness, frog support, and blade sharpness. Loose cap iron is the most common cause.
Tear-Out Problems: Lifting wood fibers indicate either a dull blade or improper cap iron position. Test sharpness first, then move cap iron closer to cutting edge.
Sticky Adjustments: Clean binding mechanisms with mineral spirits and apply a tiny amount of machine oil. Work the mechanism several times to distribute lubricant.
The Generational Legacy
Three hours of restoration work transformed that twelve-dollar estate sale find into a precision instrument worth fifty times its cost. These vintage Stanley planes were built when craftsmen expected lifetime tools.
Your restored plane will serve faithfully for decades while connecting you to generations of woodworkers who relied on these same tools. Quality endures, and sometimes the old ways really were better.
Once you’ve restored one plane, you’ll find yourself hunting estate sales for the next candidate. It becomes a rewarding addiction that fills your shop with precision tools that actually improve with age.
